Hey all!
I could not pass the opportunity to be a Guest Blogger for Minerva Crafts! So here I am posting a tutorial to make your own jeggings. I do love leggings but I’ve always wanted to have the comfiness of them but look a bit a smarter so why not have a go at jeggings! Plus it’ll also be my first pant garment construction so bare with me LOL!!
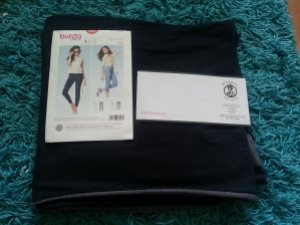
I chose the Burda Ladies Easy Sewing Pattern 6926 as it is coming to the Autumn months but still look smart with ballerinas instead of my biker boots lol.
I also picked out the ever so fab Indigo Blue Denim Look Stretch Jersey Clearance Dress Fabric from their shop too the picture doesn’t do it justice as it just looks like denim but so stretchy which is totally awesome for making these jeggings with 😀
As always make sure you launder your fabric prior to you starting to cut your pattern pieces out as this allows for shrinkage as it would be a complete shame not to do this before hand and to make these jeggings, wear it and love it then to put in the wash where it’ll shrink and they would be too small to wear!
First open up the envelope and make yourself a brew and read the instructions and make a list of materials/equipment you need if you don’t have them already so no last minute dash to the local habersary store or waiting days for online orders lol. My choice of brew today is a Jasmine Green Tea and no biccie as I’m being a Good Girl for a change hahahaha!
So when i measured myself for this pattern as I’ve never used a Burda Young Pattern before I’m measured as a US 12 Waist and US 16 Hips dam my curvy Derriere!! Lol so there’s some grading to do here :/ The Size Chart is on the actual Paper Pattern so i found it bit strange that there was no Size Guide on the outer packaging so i panicked a bit of what the sizing was like lol.
My Construction list:
1.5m of Indigo Blue Denim Look Stretch Jersey Clearance Dress Fabric as its 60″ wide so I had plenty!
28″ of 1″ Wide Black elastic ( The size of my waist plus an Inch for when sewing together)
Guterman Thread – There’s no other thread like it in my opinion, you do need good quality thread as it does show in your creations.
Paper Scissors – For cutting Pattern Pieces out as these will blunt and make cutting fabric out quite uneven!
Fabric Scissors
Pins
Tailor’s Chalk – For marking on fabric that soon rubs away
Greaseproof Paper – Tracing the Pattern onto as for some reason i don’t want to chop up my paper patterns just in-case i need to make for a gift. Also a great alternative to expensive to Dress Making Paper.
French Curve – handy for getting those straight lines whilst tracing or to grade in between sizes if your measurements are in between sizes which I have done for this pattern. So I had to grade from 12 from the waist to 16 for the hips which was pretty simple to do as it’s just remembering to do the same for the other pieces. Also this Pattern was for someone that is 5 foot 6″ tall and with myself only being 5 foot 1″ LOL i had to shorten the legs so thankfully the pattern was designed in a ankle grazer length i only had to shorten the pattern by 2″. So all i had to do was where the shorten/lengthen here marker on the pattern i measured 2″ below that and folded the lower part up to the shorten line marker and then taped down and hey presto easy way to shorten! 😀
Pencil for marking out the pattern of course
Weights/Pins– for holding down pattern pieces in place.
Iron and Ironing Board
And last but not least the Trusty Sewing Machine, Normal Foot/Overlocking Sewing Foot (optional), Ball point aka Stretch Needle as we are using Knits/Jersey as if you used a normal needle and stitch with stretchy fabrics it ends up skipping stitches. So its always best to use smallest Zig Zag Stitch and a Ball Point Needle. But if your lucky enough to have an overlocking function on your machine then you can use that with your overlocking foot. It states to use a twin needle for the decorative stitching but i didn’t bother with it i just made sure i had the lines spaced out right rather than fathing with setting up the twin needle LOL
Now then, you can go ahead and cut straight into the paper pattern to the size you require (but if your like me and like to keep my paper pattern intact then trace your pattern onto the paper and to make sure you add any nothces/markings onto the paper then cut out and the 1.5cm seam allowance is already given in the pattern too.
Fold fabric Right Sides Together selvedge to selvedge and places the pattern pieces on the top. Align the straight grain line on the pattern piece to grain of the fabric and either pin down the pieces or use pattern weights like i have its up to you! Then of course cut away!
Also i like to overlock (if you don’t have an overlock stitch on your machine just use a small zig zag stitch that works a treat too) the raw edges that will in contact of me wearing the Jeggings i.e. the Side seams so they have a lovely soft edge to them and wont irritate you whilst wearing and also so you don’t have to fiddle around doing them whilst constructing the Jeggings together.
Now onto the construction of the Jeggings:
Pin and Stitch the Hip Yoke Piece to the front Pant Piece Right Sides Together as shown below:
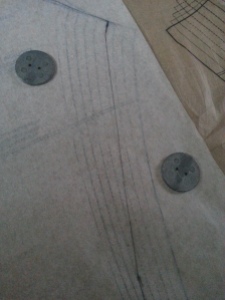
Then press the Seam towards the pant piece and repeat on the other pant side and then Topstitch both using decorative thread (I’ve used a mustard yellow to represent a jean stylee) on the Pant Piece as close to the seams as you can.
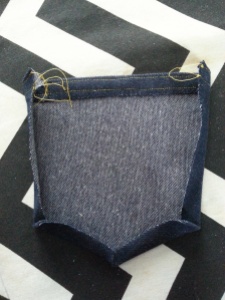
Now onto fixing the back pockets to the back of the Jeggings, it says to overlock the edges but i didn’t bother with this as i thought it would be a waste of thread plus its a pocket and the seam is tiny anyways so what i did was was pressed the seam allowance at the upper edge to the inside and Topstitch close the the Top of the Pocket and the Press the Seam Allowances for the remaining pocket edges towards the inside of the pocket and it should look like this:
Now here you have marked the pocket on the back of the pants and then sew them on, I’ve just pinned them to the markings and then sewn rather than the basting then sewing them on as it just saves time if you do it carefully 🙂
And repeat for the other pocket.
Now onto the Side Seams, Nearly there!!
Lay the Front Pieces Right Sides Together with the Back Pieces, pin in place and sew
Press the Seam Allowances towards the back piece and then Topstitch close to the Side Seams and making sure that the allowance is being stitched too which will keep it nicely tucked away. Then should look something like this:
Now to the Front Centre Seam, Place the Front Pant Pieces the Right Sides Together and pin, sew and press towards the left hand side of the pants.
Now to Topstitch the Centre Seam:
Now to join the Centre Back Seam, place the Back Pant Pieces Right Sides Together, pin in place and Sew. Then press the seam allowance to the left side of the pants and Topstitch close to the Seam.
Now to finish the Inside Leg Seams, With the Right Sides Together Pin and Sew and Press the Seam Allowance to one side which either side your prefer lol
Now turn the Jeggings right way out and lets get on with the waistband!
Now the instructions to make the waistband aren’t not very clear so i came up with another way and i think its actually a lot better than using the casing method where the elastic would somehow get twisted even though you tried your hardest to keep it all straight! So here’s goes:
With the Waistband, Sew all along the fold line.
Now pin the edges of the elastic with one side overlapping by about an inch so you have plenty of sewing space to make sure its secure and that you now have a loop. Place the elastic where we have just sewn on the fold line then pin in place and sew along the top edge of the elastic so it will stay in place along the fold line.
Then once you fold the fabric over the elastic then to finish of the seam fold over about 1cm on one side and then pin in place and sew along:
Then fold the waistband over and its now ready to sew onto the pants!
Now with the Right Sides Together Pin the waistband to the Pants matching the seam of the Waistband to the Centre Back Seam of the pants and sew into place then press the seam allowance down.
Now all that’s left is to the hem the legs!! Hurrah!!
Now i tried mine on just to double check the length of them and thankfully they did and i stitched the hem by 1cm.
And here we are a lovely pair of Jeggigs!!
These are perfect for casual wear they are so comfy and a great fit! I’m so glad i graded back down to 12 from the hip along the leg as they would of been too baggy otherwise!
And again a big thank you to Vicki at Minerva Crafts of letting me have this opportunity to blog for them 🙂 so go and get yourselves a nosey at Minervacrafts shop there is plenty of bargains to be had!
Now I’ve hoped that this tutorial has provided you some help and feel free to ask any questions or to leave some love 🙂
Sal x


[…] 1st ever pair of Jeggings and being a Guest Blogger for Minerva […]